

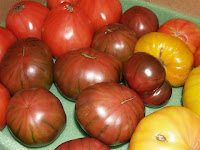
If you were to ask most people about growing tomatoes, chances are they would most likely prefer to grow them from seedlings, NOT seeds. Since many people don’t realize just how rewarding it is to watch the plants grow from seeds, they’ll purchase seedlings (which by the way, usually come in limited varieties) from their local nursery or garden centers. That’s unfortunate, as there is nothing more gratifying than to see something you’ve started from “scratch” and watch it grow to produce beautiful, luscious red, juicy tomatoes. So if you start with seeds, you can grow almost any type whether it’s a juicy red Beefsteak or any of the exotic heirloom types in a wide variety of shapes and sizes. Some that come to mind are the Cherokee Purple or maybe the Oxacan Jewel, a bi-colored tomato that ripens to a golden yellow, with streaks of red and orange. The weight of the fruit of the Oxacan ranges from 8 oz. and up. The flavor is rich, fruity, with tones of melon and slightly acidic.
So, let’s look at the “how to’s and what fors”… as you will find the most important part of growing from seeds is the temperature, humidity, nutrition and light.
First, you’re going to need to start planting your seeds somewhere around 8 weeks before the time of the last frost (you can find out when that will be from your local weather channel) and be sure to keep them in a warm place like your house.
It helps to use a "starter" seedling potting mix simply because it will usually already contain the right balance of nutrients that have been strained so that the small seeds can push through the soil and germinate properly. Plant them in your pot just like you would any other seed. An inch below the surface of the soil in a small pot or seedling tray is ideal.

You should start by wetting them down with a fine mister or sprayer. Do this every day and make sure that you keep the soil somewhere around 27°C or 80°F. This will ensure healthy growth. At least 5 hours sunlight per day should be sufficient. Keeping them on the window sill will also work.
When you see the first 3 or 4 leaves, go ahead and gently pull the tiny plants out of the starter pot and place each one into its own larger pot so as to encourage root growth. This is when you can start placing them outside for several hours per day so as to acclimate them to the outdoors.
After the last frost you can begin transplanting them into your flower or vegetable garden – or container. You’ll find that that’s the optimum time for this is Memorial Day weekend. You could start earlier, but you’ll have to baby sit them.
You will to need to plant them 3 feet apart since they’re going to get bushy. Also, make sure you weed them often and don’t over fertilize your plants while they’re still young as you’ll end up with one huge plant with fewer tomatoes.
Tomatoes take about six weeks to grow from seed to maturity. The tomatoes you choose should be based on how you’re going to use them. For instance, if you want a nice juicy tomato you can make a sandwich with, something like a Moreton is a good choice. If you’re looking for something a little firmer that you can slice that stays nice and firm, you should check out the Pik-Red. That is an excellent tomato.
 That’s how easy it is to grow your own juicy, red tomatoes from seed, and I think the most flavorful ones are the heirlooms. There are quite a few online seed sellers who specialize in providing heirloom seeds. For more details of the many delicious heirloom varieties and seed available check out Heirloom and Domestic Tomato Varieties. I've also found a lot of great and affordable tomato gardening tips at How to Grow the Best Tasty Tomatoes Ever!
So, let’s look at the “how to’s and what fors”… as you will find the most important part of growing from seeds is the temperature, humidity, nutrition and light.
First, you’re going to need to start planting your seeds somewhere around 8 weeks before the time of the last frost (you can find out when that will be from your local weather channel) and be sure to keep them in a warm place like your house.
It helps to use a "starter" seedling potting mix simply because it will usually already contain the right balance of nutrients that have been strained so that the small seeds can push through the soil and germinate properly. Plant them in your pot just like you would any other seed. An inch below the surface of the soil in a small pot or seedling tray is ideal.

When you see the first 3 or 4 leaves, go ahead and gently pull the tiny plants out of the starter pot and place each one into its own larger pot so as to encourage root growth. This is when you can start placing them outside for several hours per day so as to acclimate them to the outdoors.
After the last frost you can begin transplanting them into your flower or vegetable garden – or container. You’ll find that that’s the optimum time for this is Memorial Day weekend. You could start earlier, but you’ll have to baby sit them.
You will to need to plant them 3 feet apart since they’re going to get bushy. Also, make sure you weed them often and don’t over fertilize your plants while they’re still young as you’ll end up with one huge plant with fewer tomatoes.
Tomatoes take about six weeks to grow from seed to maturity. The tomatoes you choose should be based on how you’re going to use them. For instance, if you want a nice juicy tomato you can make a sandwich with, something like a Moreton is a good choice. If you’re looking for something a little firmer that you can slice that stays nice and firm, you should check out the Pik-Red. That is an excellent tomato.

